Back To Top

Back To Top
Comment

Hey everyone, Deon here.
I wanted to create this blog post as a straightforward way of showing you all how to blog from when you are “on the go” using nothing more than a mobile device (android/iphone).
If you are anything like me, you may not be sitting at your computer every second of the day so you need an efficient way to capture those blog-post ideas that catch you off guard.
Remember that in the Video Training Series we created for you guys, we stated that the DeonVsEarth platform is built upon the wordpress interface. Therefore we can use the WordPress mobile app to login into the DeonVsEarth server and blog from anywhere!
Using this mobile app, we are now equipped to quickly jot down our ideas as a “Draft” before they can escape into oblivion.
Although this tutorial will be using the Android system, the same concept holds true no matter what device you are using so long as the wordpress app is supported.
As of date, the wordpress application can be found in virtually every app-store.
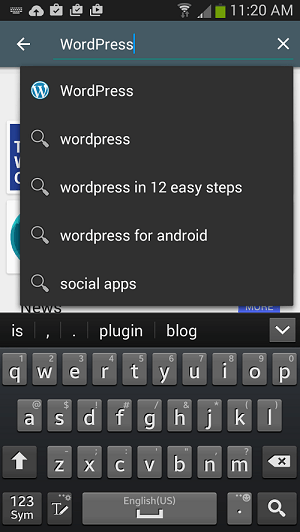
Once you have found the WordPress app within the app-store of your mobile device, you must then install the application onto your device.
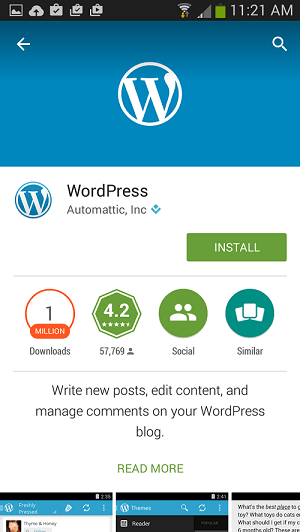
Once the wordpress app has been installed on your device, you will now navigate to the app and open it.
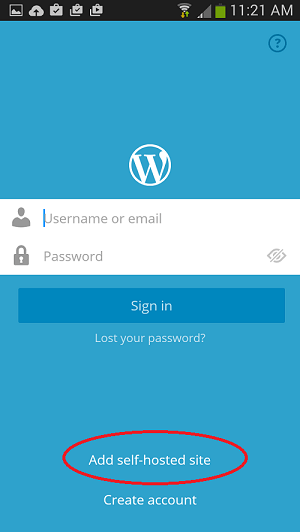
Because wordpress comes in 2 forms (Public and Private), the initial login form will attempt to log users into the public wordpress server (wordpress.com) — But this is not what we want.
Although DeonVsEarth uses the wordpress platform (wordpress.org) to power our server, The DeonVsEarth website itself is hosted on a Private server. Therefore we need to let wordpress know that we are trying to log into a private (or ‘self-hosted’) server.
Therefore we will need to look at the bottom of the screen and select the “Self-Hosted” option.
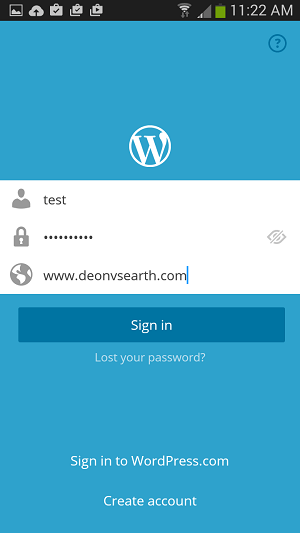
Now that wordpress knows that we are trying to log into a self-hosted server, It adds another form where we can designate which server (or website) we are trying to log into.
Once you have reached this step you can begin typing in your username and password.
You will also be prompted to enter the URL of the website you are trying to access, It is here that you will enter the domain for DeonVsEarth (www.DeonVsEarth.com)
Once you have successfully completed the information, you will be permitted to log into the DeonVsEarth server using the wordpress application.
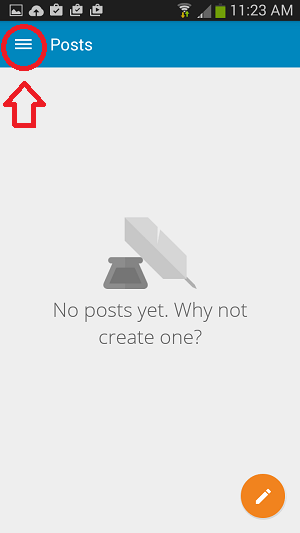
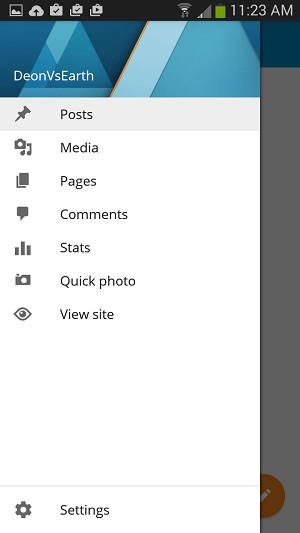
Initially you will be shown an overview of the posts that you have written, but from there you can also access the basic components of the wordpress dashboard by clicking the “more” icon in the top-left.
After you have completed all of these steps, you are pretty much set with everything you need to get started blogging and writing from your mobile device.
But remember, because you will be writing from your mobile device you will not have access to all the same features that you have when writing from a computer — such as sharing images and videos from the web. You can however share Media that is already located on your mobile device.
The wordpress application also offers a way that you can “Lock” the application to prevent unauthorized entry. Although you may be the only one who uses your phone in most cases, I think it would be best if everyone took the time to complete this step because it ensures that no “accidents” will occur.
What would happen if you lost your phone, or if it was stolen (god forbid)?
Better yet, lets say you let your your kids hold your phone, would you be upset if they opened the app and typed “kjsgnannso assdss32 sdnz4th[a’ag” at the beginning of your blog post for thousands of viewers to see?
Or what if they accidentally erased the entire blog post that you spent days creating?
The best way to avoid this is to spend 30 seconds setting up a security pin that must be entered before the app can be opened.
Once logged into the wordpress application, click the “Settings” tab.
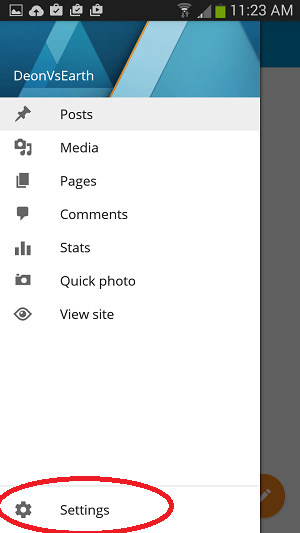
From there you will be taken to the settings page where you will continue scrolling down until you see the section labeled “PIN lock”.
You will then select “PIN lock” and “Turn PIN lock on”.
From there you will be prompted to enter your pin twice.
Once you have done this the application will automatically lock each time it is closed, thus preventing unauthorized entry.